phpstudy环境下,bedrock部署安装教程
环境配置成功后,快速创建基于bedrock的项目命令行如下:
composer create-project roots/bedrock your-project-name
bedrock需要提前安装composer工具,PHP(>=8.1), 桌面端git工具(命令行终端工具)
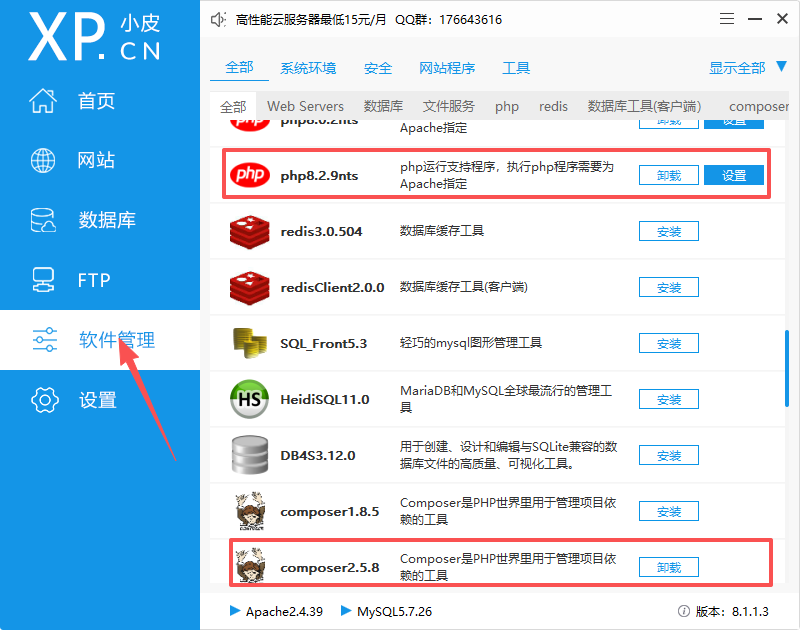
1.phpstudy软件管理中添加php(>=8.1)和composer工具
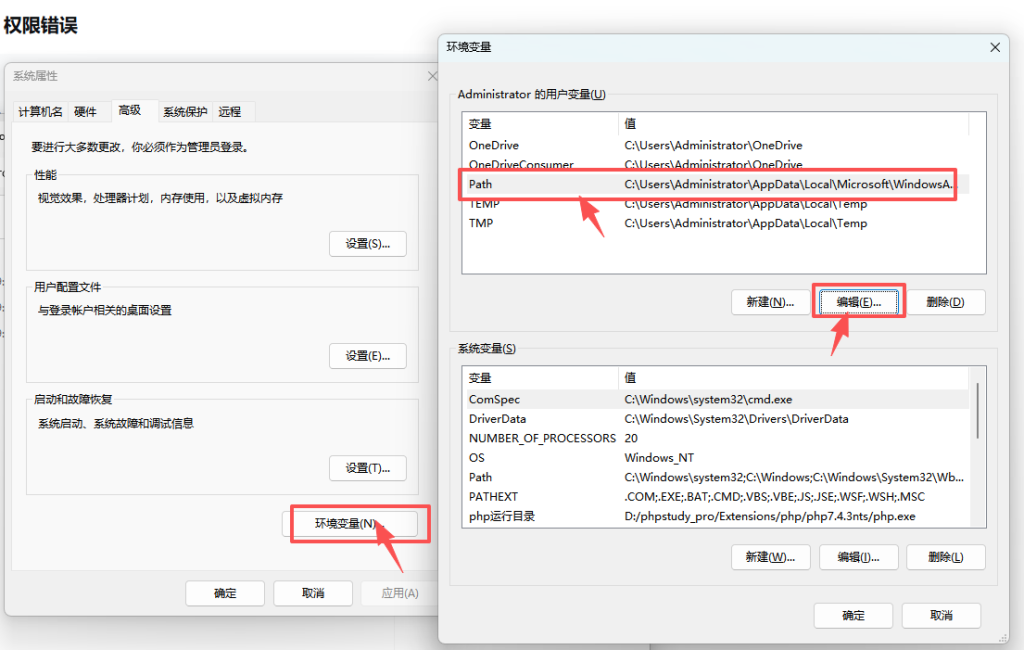
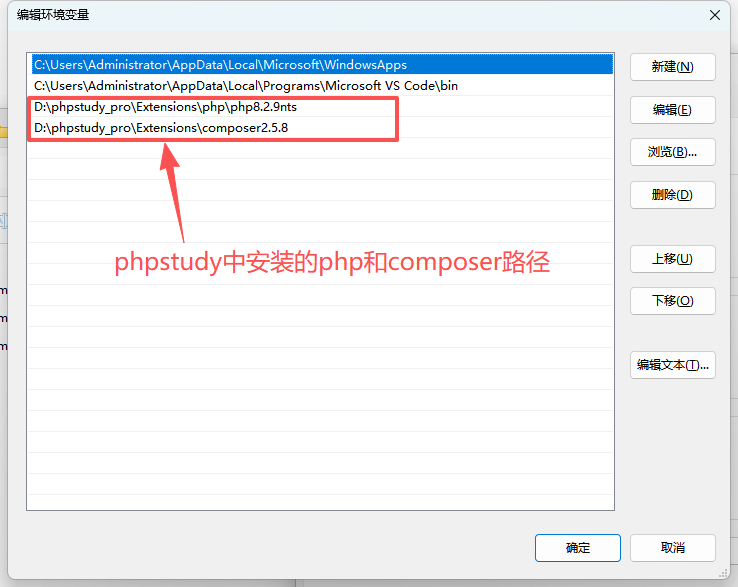
2.配置php和composer为windows系统环境命令(全局生效,用的时候不需要指定路径)
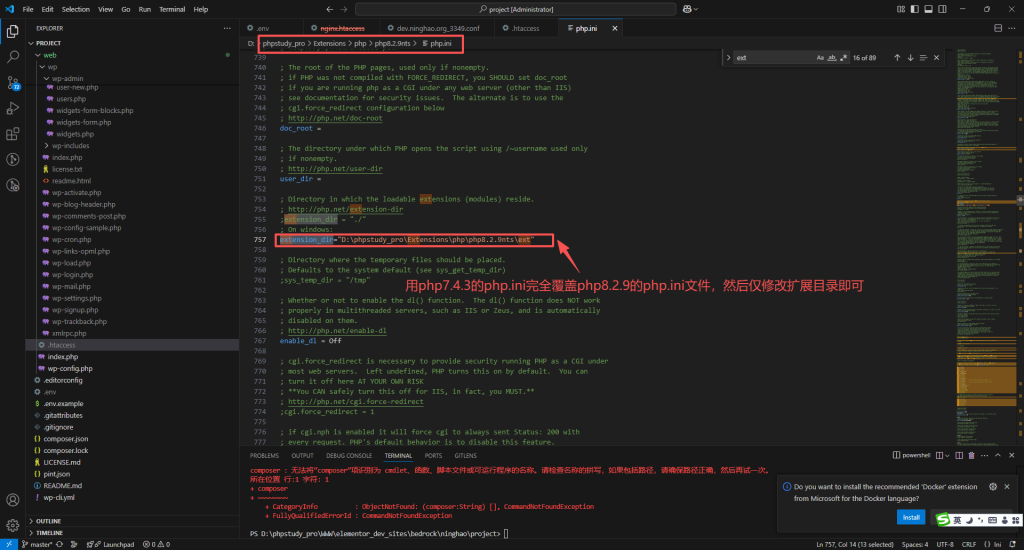
3.复制php 7.4.3的php.ini内容,整个替换php 8.2.9的php.ini内容,重新修改extension_dir目录路径。主要原因是phpstudy中的8.2.9版本的PHP,扩展配置过于简单,一些bedrock必需的扩展没有配置,会导致composer install项目时,报错ssl问题。直接把7.4.3php.ini覆盖是最省事的做法。
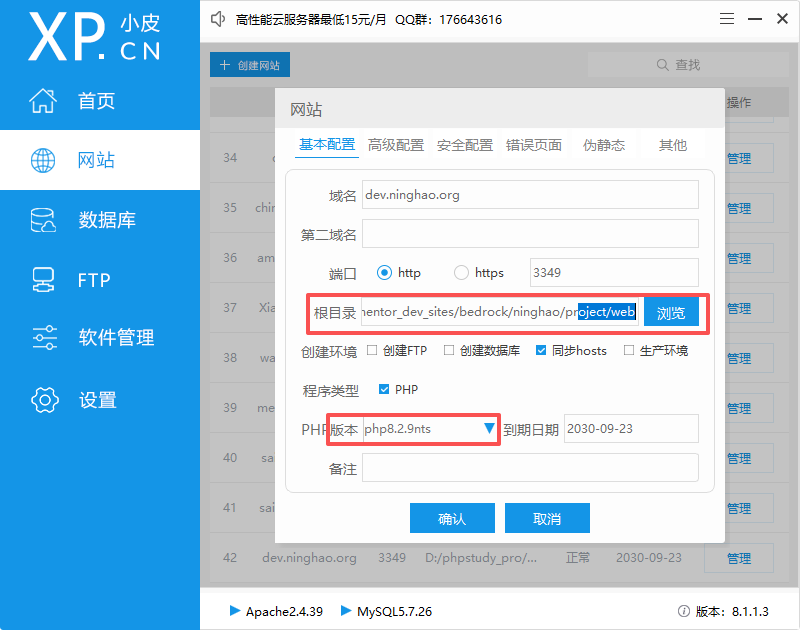
4.Apache下,项目配置需要调整的地方如下:
4.1 bedrock项目根目录为web目录
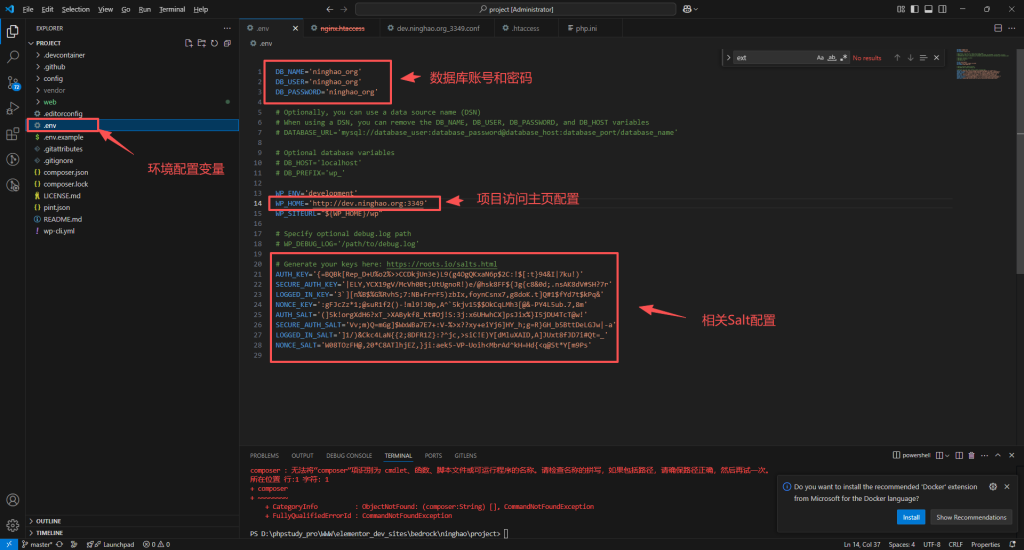
4.2. .env项目变量配置
4.3. 项目web目录下,配置.htaceess文件内容如下
# BEGIN WordPress
# The directives (lines) between "BEGIN WordPress" and "END WordPress" are
# dynamically generated, and should only be modified via WordPress filters.
# Any changes to the directives between these markers will be overwritten.
<IfModule mod_rewrite.c>
RewriteEngine On
RewriteRule .* - [E=HTTP_AUTHORIZATION:%{HTTP:Authorization}]
RewriteBase /
RewriteRule ^index\.php$ - [L]
RewriteCond %{REQUEST_FILENAME} !-f
RewriteCond %{REQUEST_FILENAME} !-d
RewriteRule . /index.php [L]
</IfModule>

# END WordPress

# 安全设置
<Files ".env">
    Require all denied
</Files>

<Files "composer.json">
    Require all denied
</Files>

<Files "composer.lock">
    Require all denied
</Files>

# 缓存和性能优化
<IfModule mod_expires.c>
    ExpiresActive on
    ExpiresByType image/jpg "access plus 1 month"
    ExpiresByType image/jpeg "access plus 1 month"
    ExpiresByType image/gif "access plus 1 month"
    ExpiresByType image/png "access plus 1 month"
</IfModule>

# Gzip 压缩
<IfModule mod_deflate.c>
    AddOutputFilterByType DEFLATE text/plain
    AddOutputFilterByType DEFLATE text/html
    AddOutputFilterByType DEFLATE text/xml
    AddOutputFilterByType DEFLATE text/css
    AddOutputFilterByType DEFLATE application/xml
    AddOutputFilterByType DEFLATE application/xhtml+xml
    AddOutputFilterByType DEFLATE application/rss+xml
    AddOutputFilterByType DEFLATE application/javascript
    AddOutputFilterByType DEFLATE application/x-javascript
</IfModule>

5.初始化项目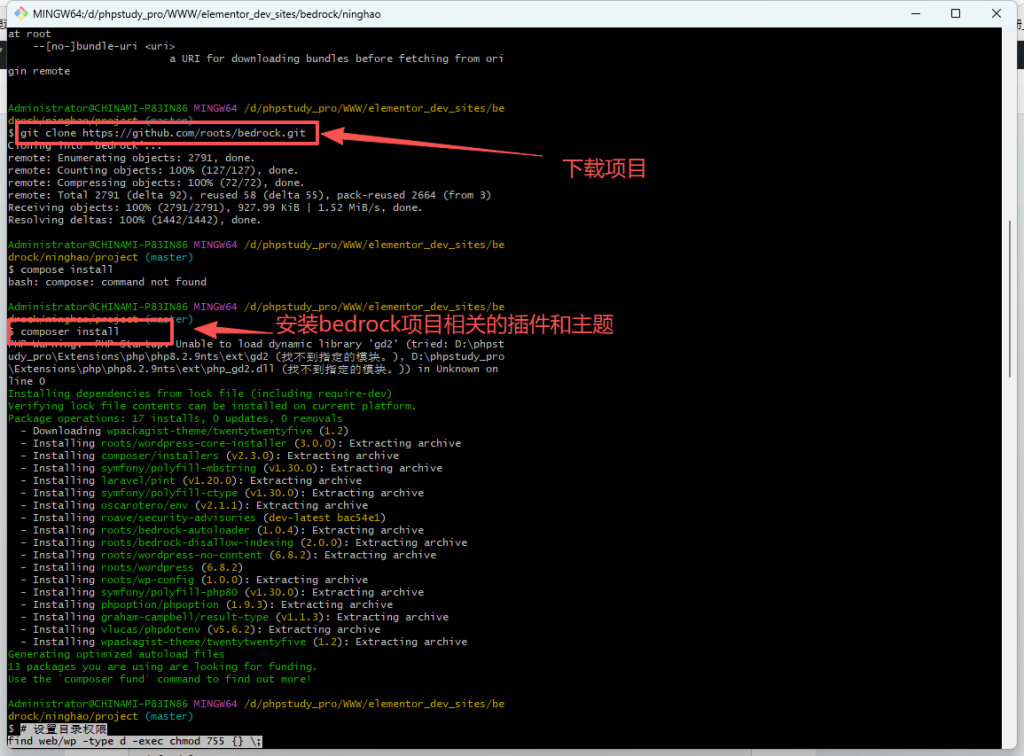
6.配置项目文件和目录权限(phpstudy环境中,不需要执行下面命令),浏览器访问地址,应该就可以正常进入到WP配置安装界面
# 进入项目目录
cd /path/to/your-project

# 设置目录权限
find web/wp -type d -exec chmod 755 {} \;
find web/wp -type f -exec chmod 644 {} \;

# 设置上传目录可写
chmod -R 775 web/app/uploads/

# 设置 .env 文件权限(仅所有者可读)
chmod 600 .env

# 更改文件所有者(根据你的 Apache 用户)
chown -R www-data:www-data /path/to/your-project
相关参考文档: